How to Make (or Reactivate) a Sourdough Starter
Creating and maintaining a sourdough starter can seem intimidating, but it really becomes like a new exciting pet you get to care for (and it also becomes a very useful part of the family!). It takes time to learn your sourdough starter’s habits, teach it new ways of adapting based on the season, and adjusting its feeding schedule to suit your needs. There isn’t a strict set of rules when it comes to sourdough starters. Instead, there are general guidelines that can help you, but the ultimate goal is that you will use YOUR starter when YOU want to. I have found my starter to be incredibly adaptable (given the right adjustments), which allows me a lot of flexibility in how and when I use my starter.
How do you create a sourdough starter? Two ways. Either, you can get some starter (“live” or dehydrated) like the one I sell in our farm shop. Secondly, you can make your own from scratch. Using a starter benefits you because you get a jumpstart on the fermentation process. Also, you don’t have to use/waste as much sourdough discard. But, if you create your own starter from scratch, then it may take a little longer, but you can use simple ingredients that you already have in your house: flour and water. First, let’s start with how to reactivate your sourdough using a dehydrated sourdough starter.
How to Reactivate Your Dehydrated Sourdough Starter
EQUIPMENT
- Mason jar and lid/ring, or any pint or quart-sized jar with lid (for the initial set up)
- Larger glass container if desired (like the 1/2 gallon jar with lid from Walmart)
INGREDIENTS
- Dried sourdough starter culture
- All-purpose flour, preferably unbleached like King Arthur; or einkorn or whole wheat flour
- Filtered room temperature water (non-chlorinated)
INSTRUCTIONS
Day 1
In your clean pint or quart-sized jar, combine your bag of dried sourdough starter with 1 1/2 tablespoons of filtered room temperature water using a fork or spoon. Let it sit for a few minutes until softened and combined.
Add in 1 more tablespoon of flour and mix thoroughly until thick and gooey. Cover your jar with its lid or with plastic wrap, and set it in a warm location (70- 75 degrees F at least) for 24 hours.
Day 2
Into the same jar as yesterday, add 1 Tbsp of flour and 2 teaspoons of water to the starter and mix well using a fork or spoon.
Cover your jar or container again, and allow it to sit for another 24 hours.
Day 3
Repeat the same feeding process as Day 2 (1 Tbsp flour and 2 teaspoons water).
Day 4
This time, add 1/3 cup flour and 1/4 cup water to the starter and mix well using a fork or a spoon.
Cover your jar and set it aside again. If you have a dry erase marker or rubber band, mark the level of the sourdough starter after feeding it so that you can watch how much it will rise.
Day 5
Transfer your starter from the mason jar into a clean mixing bowl using a spatula or spoon.
Combine around 2/3 cup or just under 1 cup of flour with 1/2 cup of water with the starter from the last few days. Mix thoroughly.
Transfer the starter into a new larger jar if desired, such as a 1/2 gallon container or a flip top 1 liter glass jar. This is where your starter will live from now on. Set your new jar aside at room temperature again.
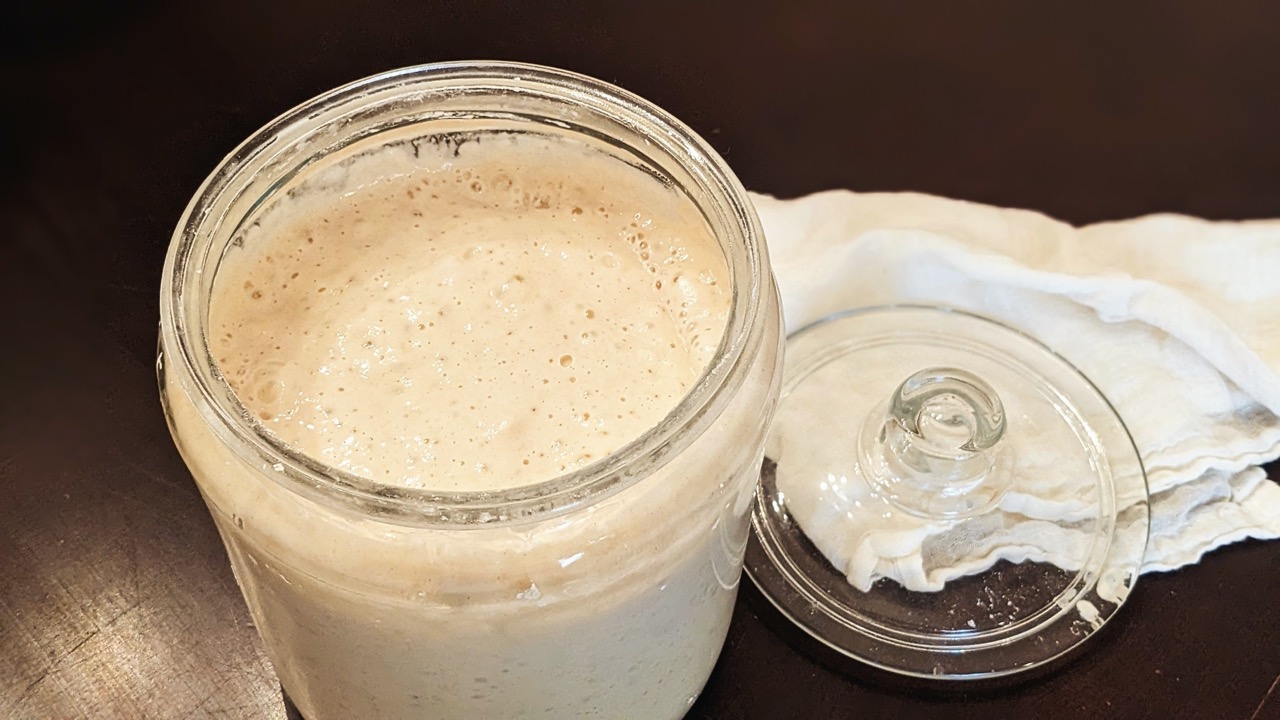
Your starter should be actively bubbling with the “breathing,” or rising and falling action by now. If so, then you have successfully reactivated the dry sourdough starter! When a starter rises to double its size and then stays elevated, that is considered its “peak activity” and is ready to bake with. It will deflate and go flat after a few hours and need to be fed or refrigerated.
If your starter is not yet bubbling or rising and falling, then continue feeding it around 1/2 cup flour and 1/4 cup water for the next few days until it is bubbly and active. If you don’t see any signs of activation, then consider switching the type of water to filtered spring/bottled water as chlorine in tap water may alter results. If it’s not the water, then try keeping your starter in a warmer environment such as on top of the fridge, or inside the oven with the light on but with the oven off.
Ongoing Starter Maintenance
From now on, feed your sourdough starter a 1:1 ratio of flour and water using a kitchen scale. An example would be to feed it 60 grams (1/4 cup) water and 60 grams (1/2 cup) flour a few hours before you want to use it in a recipe (or use more if the recipe calls for a lot of starter). If you are only going to bake once a week or take a vacation, then feed your starter and put it in the fridge until you are ready to use it again. When you are ready, take it out of the fridge to bring it up to room temperature, then feed it a few hours before you want to use it in a recipe as usual.
- Always use your sourdough starter in a recipe when it is bubbly and active, not flat.
- Always leave at least a small amount of starter at the bottom of your jar. Never deplete your entire jar of starter.
- After taking your starter out of the fridge, make sure to bring your starter up to room temperature and then feed it, allowing it to double in size (about 4-6 hours) before using it again.
A Note About Consistency of Your Starter
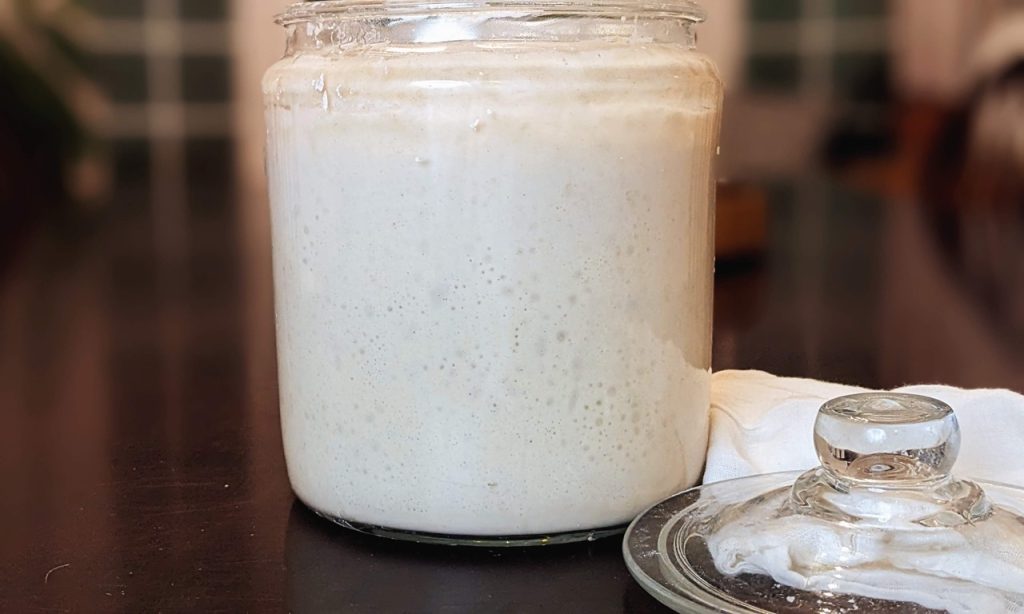
Every home environment (e.g. different elevations and humidity) can lead to variations in sourdough starters. The goal throughout this process is to maintain a thick gooey starter that resembles pancake batter or marshmallow fluff when your starter is active, not firm cookie dough that clumps up at the bottom of the jar. If at any time throughout this process you feel that your starter has become too stiff or too thin, add a tablespoon or two of flour or a bit of water until the desired consistency is reached. Do so in small quantities, such as a teaspoon or tablespoon at a time (especially in the first few days).
Can I use other types of flour for my starter?
Yes you can. You can use rye, whole wheat, einkorn, or any other types of flour you’d like. My recommendation though is to stick to one type of flour for your starter. Stay consistent for your sourdough starter with one flour type, and then you can add and/or mix other types of flour into your actual bread dough for varied loaves.
Just be sure that whatever type of flour you use, it is UNBLEACHED and UNENRICHED if possible.
Can I Make a Starter without the Dehydrated Sourdough Starter?
Yes! The process is a little different, and the main difference is that when you are making your sourdough starter from scratch, you’ll be 1) using a lot more flour and water and 2) discarding a good amount of your starter over the first few days as it gets going because you are using significantly more flour and water than you do if you use the dehydrated sourdough starter.
How to Create a Sourdough Starter from Scratch
Equipment
- a glass or plastic container (mason jar works great)
- a kitchen scale
- a spoon or spatula for mixing
- You can also use a larger jar such as a 1/2 gallon jar as well
Ingredients
- Flour (unbleached, but you can do all-purpose, whole grain or rye)
- Filtered water
Instructions
Day 1
Mix Flour and Water by combining a 1:1 ratio by weight of flour and water (e.g., 100g flour and 100g water) in your jar. If using volume measurements, about 1/2 cup of flour and 1/4 to 1/3 cup of water. Stir well, and it should be the consistency of thick pancake batter. Cover your jar loosely with a cloth, lid, or plastic wrap. If you get fruit flies in your kitchen, then use a mason jar lid. Place your jar in a warm spot, ideally between 70°F and 75°F (21°C to 24°C), for 24 hours.
Day 2
You may start to see some bubbles, which is a good sign! But if not, that’s okay too because it’s only been a day. Now, discard half of your starter (about 100g) and feed it 100g of fresh flour and 100g of water. Mix well and cover again.
Days 3-7
Continue discarding half of the starter and feeding it with equal parts flour and water once every 24 hours. Your starter should begin to bubble more, rise, and develop a pleasant and tangy smell.
Days 7 +
Your starter will be ready to use when it doubles in size within 4-6 hours of feeding. It should be bubbly, airy and have a nice “yogurty” smell.
Ongoing Maintenance
Same as above. To maintain your starter, keeping feeding your starter daily, or store it in the fridge if you’re not going to bake within a day or two. When your starter is refrigerated but you want to use it again, let it warm up and then feed it again before using it.
Feel free to adjust the flour-to-water ratio to achieve the consistency you prefer, and remember that sourdough starters are quite resilient and adaptable!